There are plenty of possibilities of how to make a nice popup contact form on your website. In this tutorial, I’m going to show you a plugin-free solution using the same technology as the Divi Builder → Magnific Popup. In this tutorial, I’m using Caldera Forms but you can use other forms such as Gravity Forms, Formidable Forms, WP Forms, and others. I chose Caldera Forms (which I’m also using on my own website) because it’s free and pretty extensive in terms of functionality.
1. Download Caldera Forms or Other Form Plugin
2. Create a New Form
3. Create a new page and build your layout
You may have already created your page. The important thing is to have a button on your page which we will use to display the PopUp.
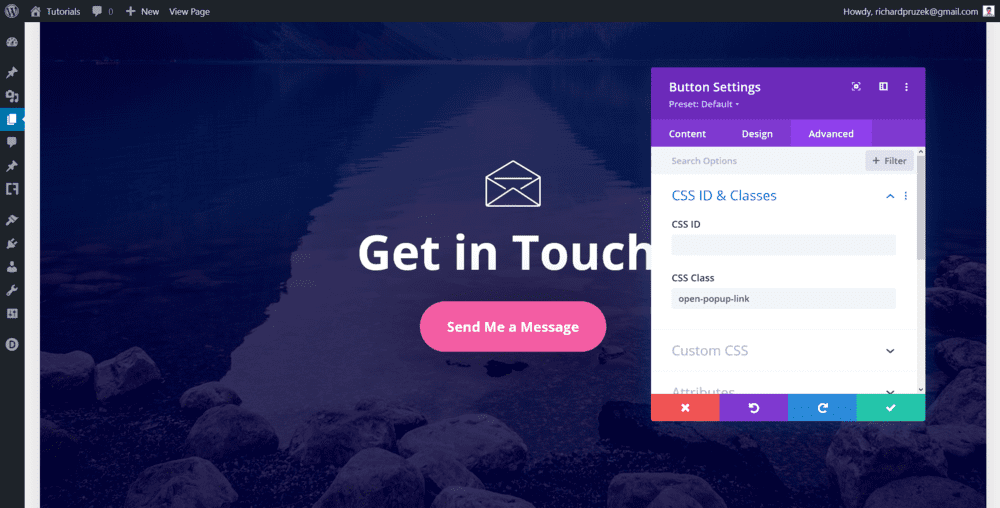
4. Give your button open-popup-link class
Open your button’s settings, go to the Advanced tab and click on CSS ID & Classes. Give the button a class of open-popup-link.
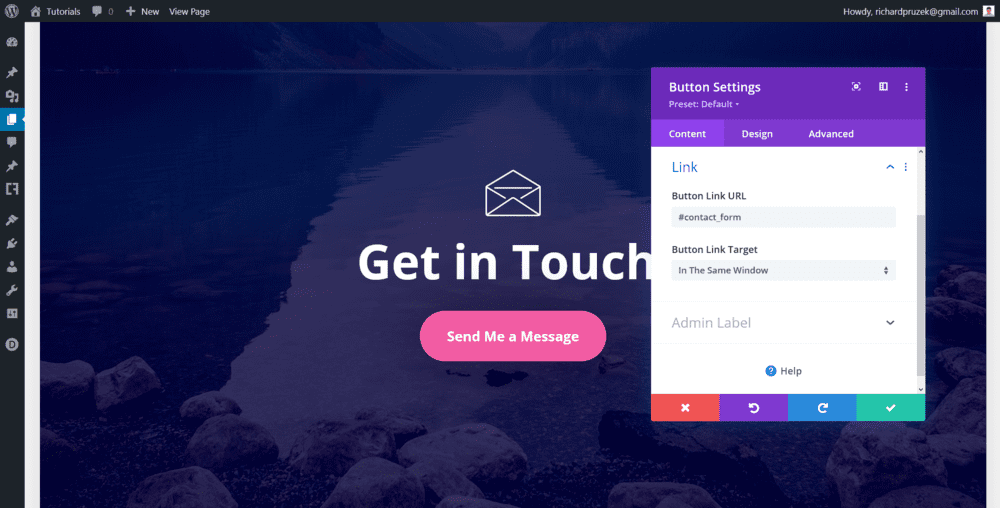
5. Add the Button Link URL as #contact_form
Go to the Button Settings, click on Link and add the Button Link URL: #contact_form.
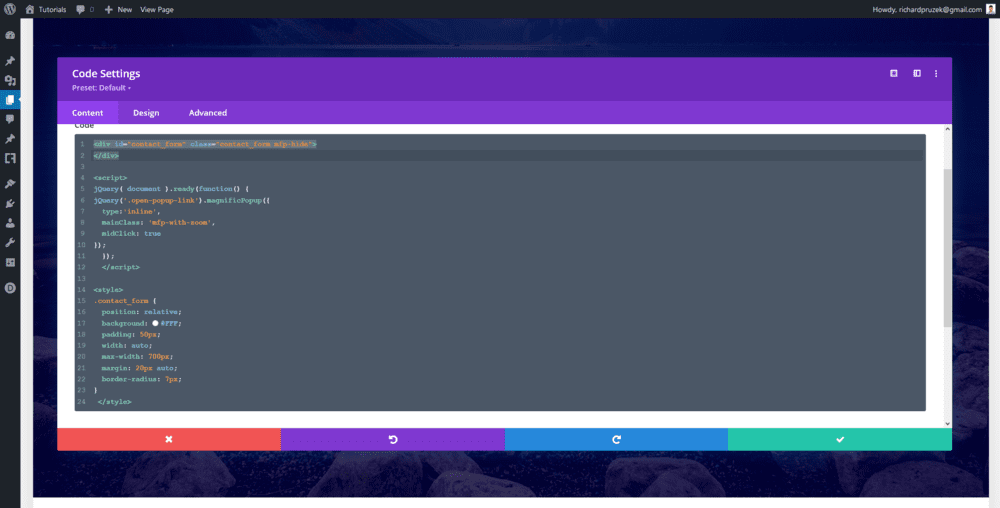
6. Paste the PopUp HTML, jQuery & CSS code
You can paste the following code to a code module below your button, to the Theme Options, or to your child theme. For simplicity reasons, I pasted everything to a code module bellow my button.
HTML
<div id="contact_form" class="contact_form mfp-hide"></div>
CSS
<style>
.contact_form {
     position: relative;
     background: #FFF;
     padding: 50px;
     width: auto;
     max-width: 700px;
     margin: 20px auto;
     border-radius: 7px;
}
</style>
jQuery
<script>
jQuery( document ).ready(function() {
jQuery('.open-popup-link').magnificPopup({
  type:'inline',
  mainClass: 'mfp-with-zoom',
  midClick: true
});
  });
</script>
Your code module will look like this:
Note: Don’t use <style></style> tags if you paste your CSS to Theme Options or child theme’s CSS! Use it only in case of a code module.
7. Paste Form Shortcode just before </div>
Go back to your Caldera Forms overview and grab your form’s ID (it’ll be shown after clicking on Get Shortcode). Paste this ID just inside the div you pasted to the code module in step Nr. 6.

8. Style your form with CSS (optional)
You may want to style your form with a bit of CSS (the code below may be different if you decided not to use Caldera Forms).
/*** Contact Form CSS ***/
.contact_form {color: rgba(2, 36, 87, .7); letter-spacing: 1px;}
.contact_form h2 {font-weight: 700; color: #022457; font-size: 35px;}
.contact_form .caldera-grid .form-control {border: 0; box-shadow: none; background: rgba(0,0,0,0.05); padding: 25px; border-radius: 5px; margin-bottom: 20px; color: #022457;}
.contact_form .mfp-close {background: rgba(0,0,0,.05)!important; opacity: 1; color: #F25CA2; border-radius: 50%; margin: 10px; transition: all .3s ease;}
.contact_form .caldera-grid .btn-default {background: #F25CA2; color: white; border: 0; width: 100%; height: 60px; border-radius: 50px; font-weight: 700; font-size: 18px; transition: all .3s ease;}
.contact_form .caldera-grid .btn-default:hover {background: rgba(0,0,0,.05); color: #F25CA2; transition: all .3s ease;}